
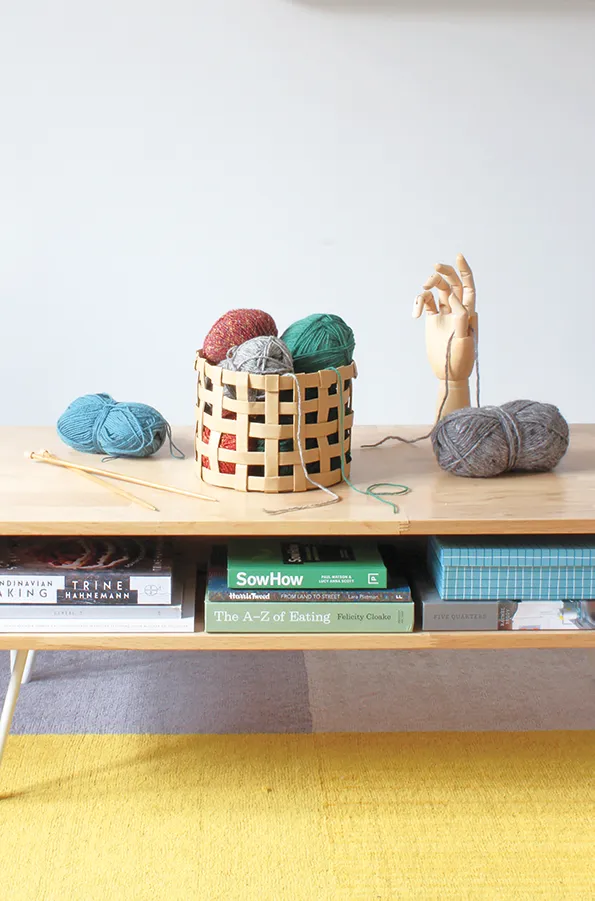
Craft projects that are even simpler to make than they look? They’re the best kind. The secret to this basket is that while it looks like wood, it’s actually made with strips of carefully folded paper. The things you can achieve by paper weaving!
Get cutting and weaving and take the basket trend in an understated Scandi direction. Because we might as well face it: we’re crafters, we’re always going to need more storage. Luckily the wonderful Mike from The Crafty Gentleman is here to teach you all the art of paper weaving and basket weaving so that you can make your own affordable storage baskets.
For more storage solutions make sure you check out our DIY storage baskets pattern and our three DIY craft storage pots which also includes another basket weaving tutorial. Or if you're looking for a complete crafty makeover head to our sewing room ideas for some beautiful inspiration.
Materials
 For the paper basket base, cut out a 20cm (77/8") diameter circle from a piece of thick card.
 Using a pencil and ruler, draw 16 equally spaced lines through the centre of the card circle. The resulting pattern should look like a sliced pizza, as shown.
 Cut out a 12 x 16cm (43⁄4 x 63/8") piece of brown paper and lay it flat on the work surface. Fold both of the long edges in towards the centre, so they meet in the middle.
 Repeat the process of folding the long edges in towards the middle, as shown.
 Fold the paper again, this time along the length through the centre so the two sides meet. This fold will hide the raw edges of the paper. Stick the sides of the paper together with double-sided sticky tape on the inside of the fold.
 Repeat Steps 3-5 until you have 16 identical strips of folded paper.
 Using the same folding process as for Steps 3-5, make five more folded strips of brown paper, each at least 75cm (291⁄2") long so they’ll be the right length to wrap around the full circumference of the circular basket base.
 Using double-sided sticky tape, stick each of the 16 smaller strips of paper to the edge of the circle cut in Step 1. Use the gridlines drawn in Step 6 as a guide, to ensure they are evenly spaced.
 Turn the circle upside down, so the grid is on the underside. Fold one of the 16cm (63/8") strips of paper over, across the top of the circle. Stick one of the longer paper strips to it with a small piece of double-sided sticky tape. They should be joined at a 90o angle.
 Weave this longer strip all the way around the circle. Alternate between weaving it over one of the outer paper strips, then under the next, and so on, until you reach the end of the paper. At this point, use more double-sided sticky tape to stick the end of the long strip against the final outer strip it was woven across.
 Repeat Steps 9 and 10 with the rest of the longer paper strips. Each time, move them 2-3cm (3⁄4-11⁄4") further up the outer strips. You also need to make sure to alternate the weaving with each piece you add – so instead of going over/under, go under/over– to build up the woven design.
 Once all the horizontal pieces are woven in, fold over the excess lengths of the shorter vertical pieces and stick them down with double-sided sticky tape. Your basket is complete and you're now a paper weaving master!
